
The best way to get started drawing the eye is not to approach it with awe as a mysterious window on the soul, but to construct it as a collection of forms, in the same way as you would draw a car or a house.

Structure
Humans are visual creatures, and the eye is an essential and fragile organ. Evolution has protected it by nestling it within the protective bone structure of the eye socket. It is protected above by a strong ridge at the base of the frontal bone. Underneath are the prominent cheekbones, and on the side there are the nasal bones. When drawing the eye, we begin by constructing this context accurately.
As with any other subject, we can simplify the structure to make it easier to grasp. In the illustration below, the brow ridge and forehead become a box with a slight backward tilt. The front of the box is the forehead and the bottom is the plane sloping toward the eye under the eyebrows. Beneath the eye we can imagine another box sloping to the cheekbone.

Note the space between the corner of the eye and the nose. In old people, the underlying bony forms begin to show more as the skin thins and loses its elasticity: the rim of the orbit and spherical form of the eyeball become more noticeable.
Note the eye does not fit straight into the side of the nose: there is a transitional plane between the eye socket and the nose. This plane goes down to the bottom or inside corner of the eye socket.

Eyeball
We tend to think of the eye as a coloured circle on an oval white background. In fact the eyeball itself is basically a sphere, swivelling within the cavity of the eye socket. We normally only see a portion of it, but though it sits under the eyelids we need to be conscious of it as a round object.
The eyeball has three parts. At the centre is a dark hole called the pupil, and around this is a coloured disc called the iris. Covering the front of the eyeball is a transparent layer, rather like a contact lens, called the cornea. The rest is the white of the eye (or sclera).

The eyeball is a round form, obeying the same rules of light as other objects, so although we don’t normally see the whole eyeball we do have to shade the part we can see. Because it is moist, the eye reflects light that strikes it, often leaving a bright highlight. The location of the highlight depends upon the direction of the light, so place it carefully. An eye that doesn’t have this glint can look dead, so don't underestimate its importance.
Eyes normally come in pairs, so you need to coordinate them. Andrew Loomis says to think of the two eyeballs as working together on a stick, as illustrated above. As you turn the stick, you also turn the eyes.
When you’re drawing someone at an angle rather than straight on, the nearer eye of the two will be slightly larger because of perspective.
The sclera
Beginners often assume the white of the eye has to be painted literally white. This is a mistake. Take a look at a real eye in context, either in the mirror or in photos, and you will notice a range of colours. Not only must the round eyeball be shaded (where visible), you must carefully observe its true colour.
The sclera has a web of blood vessels on its surface. These can sometimes become swollen or dilated, making the eye look bloodshot, either because of a medical issue or because the person has been crying.
The iris, cornea, and pupil
The cornea, which helps to shield the eye and acts as its outermost lens, sits on the eyeball like a bowl, its transparency letting the iris and pupil show through clearly.

The iris controls the amount of light entering the eye by adjusting the size of the pupil. In an adult it fills about one-third the width of the eye opening and is usually partially hidden, except in certain expressions such as shock or surprise when the eye opening widens. How it looks will vary depending on the angle you see it from. Straight on, it is a round disc, but in all other views it will become an oval.

When we describe the colour of someone’s eyes, we are describing the pigmentation of the iris. The colour varies and is heavily influenced by ethnicity: the predominant colour is usually a shade of blue, brown or green. The iris is patterned with fine, irregular lines that radiate from the edge of the pupil.

There is often a dark ring around the edge of the iris known as the limbal ring, which separates the iris from the white of the eye. This ring is stronger in the young, and a strongly contrasting limbal ring is supposedly more attractive.
The pupil is a hole in the iris that allows light to strike the retina and is easily drawn, as a small black disc. The hole dilates (i.e. expands, enlarges) to let in more light, and contracts to let in less light, but its size is not only influenced by the lighting conditions. Pupil dilation also betrays mental and emotional states, such as sexual arousal or concentration on a difficult task. Note: we will often draw the pupil as if it is on the front surface of the eye, but strictly the pupil sits in the iris behind the bulge of the cornea.
Eyelids
The eye is protected by both an upper and a lower eyelid. These wrap around the eyeball, so instead of drawing them flat, draw them as three-dimensional, curving forms. The upper lid is the active one, moving up and down over the exposed area of the eye. The lower lid hardly moves.

The orange lines in the illustration above right call attention to the contours of the various forms of the eye. Note the eyelid has a thickness, which means we must draw the bottom plane of the top lid and the upper plane of the bottom lid. These will be lit according to the light source. Artists often like to place their light source above the subject, so usually the bottom plane of the top lid will be in shadow, the top plane of the lower lid in light.

When the eye is open the top lid folds inwards and we generally see a dark line of shadow, but it closes smooth.
Shape of the eyes
The opening between the eyelids is not straightforward, because it is asymmetrical and changes shape as the eye moves. It is not an oval, like beginners usually draw. The peak of the upper lid is toward the nose, while the peak of the bottom lid is toward the ear. This is more obvious in some people than others, and there’s no need to exaggerate it – just be aware of it.

The inner and outer corners of the eye are not identical. At the inner corner, the lids meet at a triangle of pink membrane called the lacrimal caruncle. It’s less of a mouthful if we refer to this area as the tear duct, which also occupies the triangle. From that point the upper lid rises at a sharpish angle to curve over the eyeball and sweep down towards the cheek at the outer corner, where it overhangs the lower lid. The lower lid curves more gently from the inner corner until turning more sharply upwards towards the outer corner.
In side view, the opening resembles a triangle between the lids, and the tear duct is hidden behind the eyeball.
Another complication is that, thanks to the convex form of the cornea, the eyeball is not literally a sphere. This means that as the eyes move, they bulge the eyelids out into slightly different forms, as illustrated below.

Eyelashes
Both upper and lower eyelids are protected by a fringe of lashes, sensitive to touch. They grow from the eyelids, not from the eyeball! The eyelashes are uneven in length, direction and spacing, which makes them tricky.
They are thicker at the base and become thinner and lighter towards the tips, with a marked curl upward (upper eyelid) or downward (lower eyelid). The ones on the bottom eyelid are quite a lot shorter, and there are fewer of them. Lashes closer to the nose tend to be longer, lashes closer to the ears tend to be shorter. They sweep forwards, not sideways. Women’s lashes tend to be more long and elegant than men’s.

Unless you are keen to draw every individual lash, the most practical approach is to simplify them. The lashes tend to merge with the shadow under the upper eyelid to form a dark line. Then, rather than lots of individual hairs, do them as blurry, simple shapes, a bit heavier at the base. Don’t draw them with identical length, direction and spacing, as this looks fake.
Eyebrows
The brow ridge is a bony prominence that helps protect the eye, and the eyebrows grow on this ridge. They are heavier on the inside and get lighter and thinner towards the ear. Men’s eyebrows tend to be thicker, lower and straighter; women’s tend to be thinner and more arched.

Note the direction of the hairs. They sweep back and outwards. Some hairs start from below and sweep up, others start from above and sweep down.
It is common for women to style their eyebrows to some extent by plucking and applying makeup – men’s eyebrows are usually much more natural. Some women remove their natural hairs and draw on entirely new eyebrows using makeup. When done to an extreme this can look unashamedly artificial.
Step by step: how to paint the eyes
To round off this post, here is a step-by-step tutorial on how to paint a realistic eye. It is written from the perspective of a digital artist painting in Photoshop, but the process should be useful to artists working in other media. It is a realist treatment but not a hyper-realist one.
There are lots of similar tutorials out there, so if you find a different process that works for you, that’s fine too.
1. Canvas
Start with a new canvas and pick a background colour that resembles the flesh colour of your subject. This will act as a base for everything you paint on top.

2. Sketch the eye
On a new layer, sketch the eye and eyebrow. You can draw from imagination, or you may be using a reference – either a photo or a live sitter.

3. Colour blocking
On a new layer below the sketch, block in the main regions with basic colours. My subject is dark-skinned, and my eye is brown. It’s better to put the eyeball on a separate layer. Decide upon your light source and start to indicate the main forms.

Don’t make the sclera pure white. Depending on the light, it can look orange, brown, yellow, red, blue. A pale, greyish beige is good to start off. Pass over it lightly with the skin colour, because it gets reflected in the wet eye. If the eye is at an angle then the perspective will make the iris and pupil oval, but the eye in my painting is more or less straight on, so an easy method is to paint a single round brushstroke on a temporary layer, trim the top off it, then flatten the layer into the eyeball. Make the pupil round and black (though as a rule you should use pure white and black very sparingly). Add a pinkish colour for the tear duct.
To share some good advice from the beginning: rather than slapping on colour willy-nilly, try to make your brushstrokes follow the forms. Another good method is to add new painting to a temporary layer, so you can get it right, experiment with blending modes, etc before flattening it into the main layer. Personally I like to keep the number of layers to a practical minimum, to avoid confusion.
4. Shading
Build up the basic details and forms by adding some highlights and shadow areas, without overdoing the contrasts. Develop the iris by adding a lighter colour to the inside to bring out the limbal ring. The eyeball should be shaded like a sphere. The top of the eyeball, including the iris, will be a bit darker because of the shadow of the eyelid. Generally there is a pouchy area under the eyebrow (1), which overhangs the eyelid a bit. When the eyelid is open, it folds back a little and forms a dark crease (2) along the top. The rim of the orbit (3) sometimes stands out by the nose and inner corner of the eye.

Think of the planes, and remember the eyelids are not flat against the eye but have a thickness. I am using a light more or less central and from above: the planes facing the light, like the upper eyelid and top plane of the lower eyelid, will be lighter, and areas facing away from it will be darker. To help you visualise it, imagine contour lines running over the forms.

Leave the sketch layer for now. We'll remove it when we no longer need it.
5. Work on the eyeball
Keep working on the iris: darken the limbal ring and introduce additional colours. It’s up to you whether it’s worth painting in the radial pattern or treating the colours more broadly. Leave its edge a bit blurry, as hard edges tend to look unnatural. Emphasise the lash line, i.e. the line along the top of the eyeball where the eyelash and eyelid shadow combine to create a dark edge.
Work up the lights and darks of the eye white, respecting the same light source as the rest of the picture, and maybe add some additional colours such as hints of blue or red, but don’t overwork it or you’ll risk making the eyeball look textured instead of shiny and smooth. Make the eyeball darker in the corners. Note that the eye becomes pinker at the edges, an effect created by the red blood vessels on the eye white. This pinkness will get stronger as you get into the corner.
On a new layer add a highlight appropriate to the light source. The highlight can take various forms. It can be quite a complex, bright mini-image – the ‘classic’ is the four panes of a window – or you can render it more simply. Rather than just a hard, round white blob, maybe enliven it by breaking it up, dividing it into two or eating into it with areas of lower opacity. The lightest part of the iris will be opposite the highlight, as there is a slight concavity there to the eye. For added liveliness you may want to add a second, smaller highlight somewhere else... certainly if you have a second light source.

6. Work on the skin
Now let’s turn our attention to the surrounding skin. If you look at a real person you will see there are all sorts of colours there, not just a generic flesh tone. Looking at my own eyes, I can see greens and blues and reds in the surrounding skin, amongst the light (Caucasian) general tone. So try to subtly work in other colours – reds, purples, oranges, blues, greens, whatever seems to work. A subtle touch of red can bring out a bit of liveliness. For your shadows try using a slightly different, saturated colour, perhaps a bit more reddish, rather than just a darker version of the base colour. Similar advice applies for the lighter areas.
Keep re-assessing the lights and darks. Imagine you are sculpting the forms, bringing out their three-dimensionality. You will see a gentle highlight on the skin in the corner of the eye.
Your subject may be wearing eye makeup, though I haven’t included any here. Add makeup on a new layer. Rather than applying the colour flat, try to use the makeup to bring out the forms underneath, perhaps using a blending mode.

Once you’ve done all this you shouldn’t need the sketch layer any more. You can simply delete it or, if you like a more ‘painterly’ look, you can leave it there at reduced opacity, or flatten it into the skin and paint over it without worrying if it shows through. Trying to make everything perfect and smooth can make a painting look fake, as if the subject were a porcelain doll rather than a lively human being. (It’s a matter of taste, but personally I like to let my brushwork show and don’t advise overusing the Smudge tool.) You may find that removing the sketch reveals oversights in your painting: for example, perhaps the creases aren’t as defined as they should be once those guidelines are taken out. Rework a little, if so.
7. Paint the eyebrow
I will assume your subject has natural eyebrows. We have already blocked in the eyebrow but it is a series of hairs, not a solid shape. Smudge this a little to make it look natural, and use the colours of the surrounding skin to break it up.
It’s nice to use a speckled brush for the eyebrow. Otherwise you can just add single strokes. Rather than try to paint every individual hair, we start with a broad indication then work a bit of detail into it. Add some individual hairs at either end, where the eyebrow thins out and disappears.

8. Eyelashes
Create a new layer and paint the eyelashes. It is up to you how long, elegant and dramatic you make them, and whether you indicate them broadly with a rough, dark line, or paint the individual hairs. The lashes curve upwards and downwards, and taper towards the end – they shouldn’t look thick and dark at the tips. The ones on the bottom eyelid are shorter and fewer. If they don’t seem dense enough, try duplicating the layer and shifting it sideways to thicken things up, then after some erasing and smudging, flatten it into the original. Remember that lashes are a bit untidy – they aren’t equally spaced or equally long, and don’t all face the same way.

If the subject is wearing eye makeup, the lashes will look particularly thick and dark. Some beauty-conscious people even curl theirs with lash curlers, in which case they will be particularly curvy. Fake lashes will also look particularly dark and curvy, to a more or less extreme degree.
9. Add details
Emphasise the glossiness of the eye with a bright highlight on the tear duct and maybe some touches of white along the bottom edge of the eyeball to suggest wetness. The odd highlight between the lashes of the lower lid can help bring out a bit of moistness and texture.
If you look at human skin closely, it is not smooth like porcelain but has a rough texture created by pores. I don’t suggest you overdo this, but on a new layer at low opacity, dabble on some skin texture with a speckled brush, or scribble freely with a very small normal brush. Smudge it a bit to avoid any too-obvious dots – then duplicate the layer, darken it and shift it sideways a bit to increase the sense of texture. Try to observe and paint some of the larger specks and bumps that give the skin its texture.
Finally, look carefully over your lights and darks to make sure you are happy with the amount of contrast across the whole picture. For example, you may feel the darks need to be a bit darker, the lights a bit lighter. Maybe the crease above the upper eyelid needs to be emphasised more, or maybe some of the edges are too sharp and need softening or smudging.

My finished eye painting.
What to do
That’s pretty much everything I have to say about drawing and painting eyes, though they may come up again if we look at ethnic variations some day. I’m aware we haven’t discussed facial expression. This is a fundamental part of your painting that can dramatically affect the forms taken by the features, and relates to the emotional impact of the image. However, I think facial expression is a topic in itself, and you need to study it not through isolated features but in the context of the whole face.
What you do next should be obvious: draw lots of eyes. Hundreds of them, single and in pairs. Look at your own in the mirror, find photos online, and irritate your friends by staring at theirs!
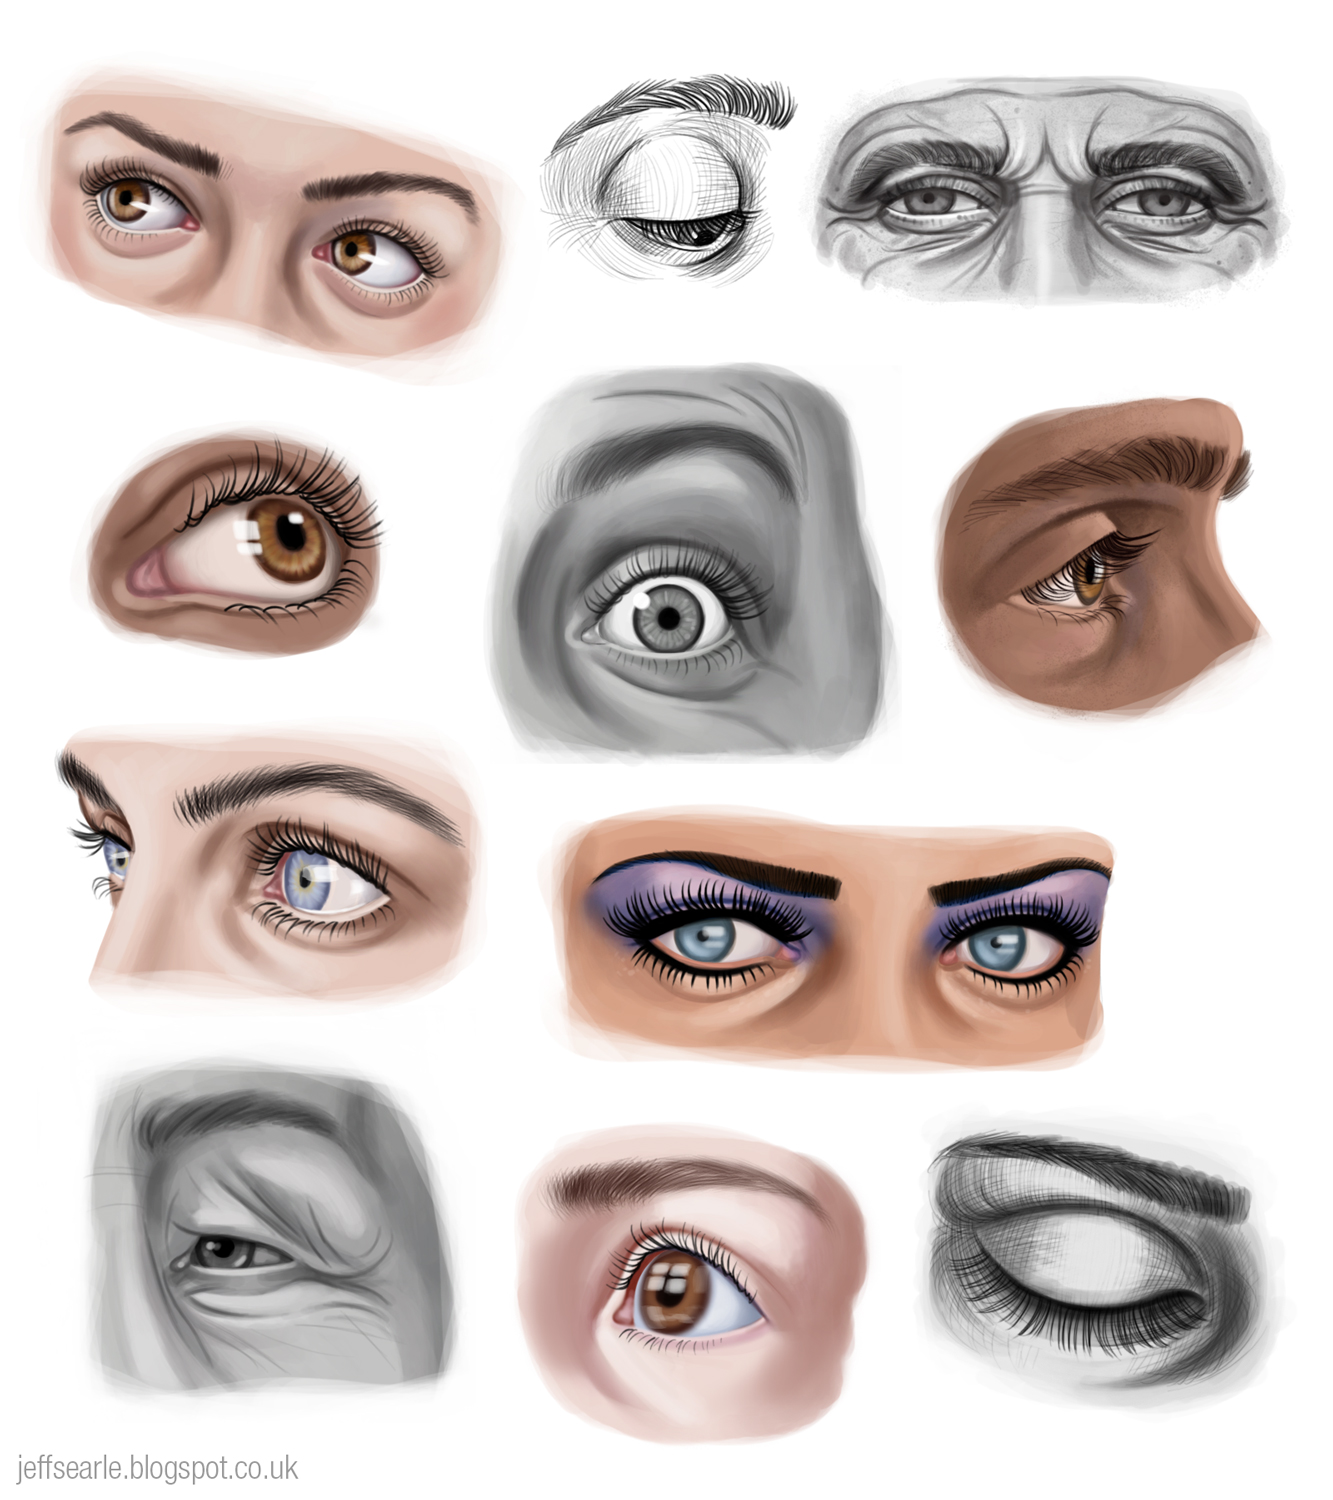
Below are a few studies I did.
No comments:
Post a Comment
I welcome contributions to this blog. Comments are moderated.